Nintendo Switch Storage: How to Expand Your Game Library Affordably

Nintendo Switch storage solutions are essential for gamers looking to expand their game library without breaking the bank, offering options like microSD cards to increase storage capacity and ensure a seamless gaming experience.
Running out of space on your Nintendo Switch? You’re not alone! Many gamers face the same issue, struggling to balance their growing game library with the limited internal storage. Discover practical and affordable Nintendo Switch storage solutions to keep your gaming adventures going without compromise.
Understanding Your Nintendo Switch Storage Needs
The Nintendo Switch, while a fantastic console, has a limited amount of internal storage. Depending on the model, you might have as little as 32GB available, which can quickly fill up with digital downloads and game updates. Understanding your specific storage needs is the first step in finding the right solution.
Let’s delve into how to assess your gaming habits and identify the best storage expansion options for your Nintendo Switch.
Assessing Your Gaming Habits
Start by analyzing how you typically purchase and play games. Do you prefer physical cartridges or digital downloads? If you primarily buy physical games, you won’t need as much extra storage since the game data is stored on the cartridge. However, even with physical games, updates and downloadable content (DLC) still require storage space.
Consider these points:
- Digital vs. Physical: If you download most of your games, you’ll need significantly more storage.
- Game Size: Some games are much larger than others. AAA titles like “The Legend of Zelda: Breath of the Wild” can take up a considerable amount of space.
- Future Needs: Think about how your gaming library might grow in the future. It’s better to overestimate your needs slightly than to run out of space again later.
Internal vs. External Storage
The Nintendo Switch offers both internal and external storage options. The internal storage is what comes built-in, while external storage is added via a microSD card. While you can’t directly upgrade the internal storage, expanding with a microSD card is a simple and cost-effective solution.
Understanding the difference is crucial for making an informed decision:
- Internal Storage: This is the built-in storage, typically 32GB or 64GB depending on the model. It’s used for system data, game updates, and downloaded games.
- MicroSD Cards: These cards slot into the Switch and provide additional storage. They’re available in various sizes, from 64GB to 1TB or more.
- Game Cartridges: Physical games don’t use the Switch’s storage for the main game data, but updates and DLC will still require space.
By carefully assessing your gaming habits and understanding the difference between internal and external storage, you can make a well-informed decision about the right storage solution for your Nintendo Switch. Don’t underestimate how quickly you will fill up the storage on your switch. The space goes faster than you would expect!
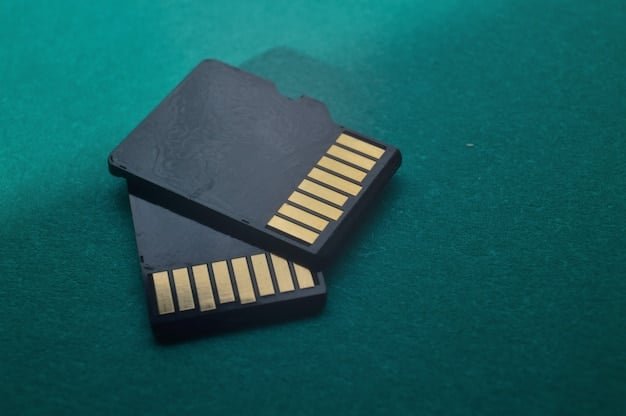
MicroSD Card Options: A Detailed Guide
When it comes to expanding your Nintendo Switch storage, microSD cards are the way to go. But with so many options available, choosing the right one can feel overwhelming. This section breaks down the different types of microSD cards, their specifications, and what to look for to ensure optimal performance.
Let’s explore the factors that make a microSD card suitable for your Nintendo Switch, ensuring smooth gameplay and fast loading times.
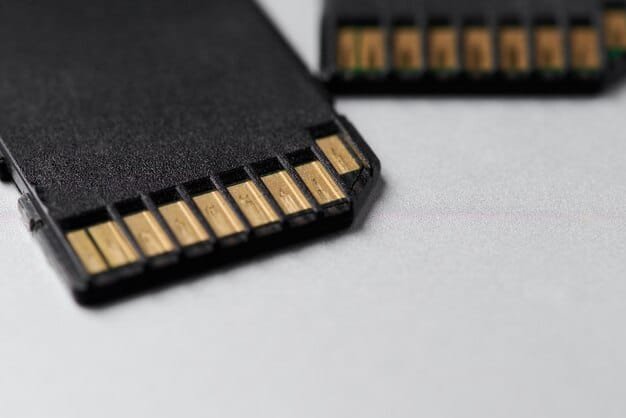
Types of MicroSD Cards and Their Specifications
MicroSD cards come in various types, each with different storage capacities and speed classes. The most common types are microSDHC (High Capacity) and microSDXC (eXtended Capacity). The Nintendo Switch supports both, but it’s essential to understand their differences.
Here’s a quick overview:
- microSDHC: Supports storage capacities up to 32GB.
- microSDXC: Supports storage capacities from 64GB up to 2TB.
In addition to capacity, speed is another crucial factor. MicroSD cards are rated by speed classes, which indicate their minimum write speed. The Nintendo Switch requires a UHS-I (Ultra High Speed) card for optimal performance. These come in U1 and U3 speed classes, with U3 being the faster of the two.
Recommended Specifications for Nintendo Switch
For the best experience on your Nintendo Switch, it’s recommended to use a microSDXC card with a UHS-I U3 speed class. This ensures fast data transfer rates, which are essential for loading games and transferring data quickly.
Consider these recommendations:
- Capacity: 128GB, 256GB, or 512GB are popular choices, depending on your storage needs.
- Speed Class: UHS-I U3 is the sweet spot for performance and price.
- Brand: Reputable brands like SanDisk, Samsung, and Lexar are generally reliable choices.
Avoiding Counterfeit Cards
One of the biggest risks when buying microSD cards online is the prevalence of counterfeit cards. These cards are often advertised with higher storage capacities than they actually have, and they can also be much slower than advertised. To avoid counterfeit cards, always buy from reputable retailers and be wary of deals that seem too good to be true.
Tips to avoid counterfeit cards:
- Buy from Trusted Retailers: Stick to well-known retailers like Amazon, Best Buy, or Target.
- Check Reviews: Read customer reviews to see if others have reported issues with the card.
- Verify Capacity: Use a software tool to verify the actual storage capacity of the card.
By understanding the different types of microSD cards, their specifications, and how to avoid counterfeit cards, you can confidently choose the right storage solution for your Nintendo Switch. Pick out the size you think you will want, and then go one size or two higher.
Budget-Friendly Storage Solutions
Expanding your Nintendo Switch storage doesn’t have to break the bank. There are several budget-friendly options available that provide ample storage without compromising performance. This section explores affordable microSD card options and strategies for managing your storage effectively.
Let’s dive into how you can maximize your storage capacity while keeping costs down.
Affordable MicroSD Card Options
Several brands offer microSD cards that provide a good balance of performance and price. Keep an eye out for sales and discounts, as microSD card prices can fluctuate quite a bit.
Consider these budget-friendly options:
- SanDisk Ultra: A popular choice that offers good performance at a reasonable price.
- Samsung EVO Select: Another reliable option with decent read and write speeds.
When shopping for microSD cards, compare prices across different retailers to find the best deal. Amazon, Best Buy, and other major retailers often have sales on storage devices, so it’s worth checking regularly.
Optimizing Storage by Archiving Games
One of the most effective ways to manage your Nintendo Switch storage is to archive games you’re not currently playing. Archiving removes the game data from your console, but it keeps the game icon on your home screen. When you want to play the game again, you can simply re-download it from the Nintendo eShop.
Here’s how to archive games:
- Go to System Settings: From the Nintendo Switch home screen, select “System Settings.”
- Data Management: Scroll down to “Data Management” and select it.
- Manage Software: Choose “Manage Software” and select the game you want to archive.
- Archive Software: Select “Archive Software” to remove the game data.
Managing Downloaded Content
In addition to archiving games, you can also manage your downloaded content to free up storage space. This includes deleting demos, trailers, and other files that you no longer need.
Follow these steps:
- Go to System Settings: Navigate to “System Settings” from the home screen.
- Data Management: Select “Data Management.”
- Quick Management: Choose “Quick Management” to see a list of downloaded content.
- Delete Unnecessary Files: Select the files you want to delete and confirm your selection.
By exploring affordable microSD card options and implementing storage management strategies, you can effectively expand your Nintendo Switch storage without exceeding your budget. Do not pay overprice for the storage when there are affordable budget solutions out there now.
Transferring Data and Managing Saves
Upgrading your Nintendo Switch storage often involves transferring data from your console to the new microSD card. This section provides a step-by-step guide on how to transfer data safely and efficiently. Additionally, we’ll cover managing game saves and cloud backups to ensure your progress is always protected.
Let’s walk through the data transfer process and discuss best practices for managing your game saves.
Step-by-Step Guide to Transferring Data
Transferring data from your Nintendo Switch to a microSD card is a straightforward process. Here’s how to do it:
- Power Off Your Switch: Turn off your Nintendo Switch completely.
- Insert the MicroSD Card: Insert the microSD card into the microSD card slot on your Switch.
- Power On Your Switch: Turn on your Nintendo Switch.
- Go to System Settings: From the home screen, select “System Settings.”
- Data Management: Scroll down to “Data Management” and select it.
- Move Data Between Console/MicroSD Card: Choose “Move Data Between Console/MicroSD Card.”
- Select Move to MicroSD Card: Follow the on-screen instructions to move your data to the microSD card.
The transfer process may take some time, depending on the amount of data being moved. Make sure your Switch is connected to a power source during the transfer to prevent it from running out of battery.
Managing Game Saves and Cloud Backups
Game saves are precious, and losing them can be devastating. The Nintendo Switch offers cloud backups for game saves, but this feature is only available to Nintendo Switch Online subscribers.
Here’s how to manage your game saves and enable cloud backups:
- Nintendo Switch Online: Subscribe to Nintendo Switch Online to enable cloud backups.
- Automatic Backups: Once subscribed, your game saves will automatically be backed up to the cloud.
- Manual Backups: You can also manually back up your game saves by going to “System Settings,” “Data Management,” and “Save Data Cloud.”
Transferring data and managing game saves are essential parts of upgrading your Nintendo Switch storage. By following these steps and best practices, you can ensure a smooth transition and protect your valuable game progress. Back up your game saves so you do not lose any progress that you have achieved in a game.
Troubleshooting Common Storage Issues
Even with the best planning, you might encounter some storage issues on your Nintendo Switch. This section addresses common problems and provides troubleshooting tips to help you resolve them quickly.
Let’s explore some frequent issues and how to fix them, ensuring a smooth gaming experience.
MicroSD Card Not Being Recognized
One common issue is the Nintendo Switch not recognizing the microSD card. This can be caused by several factors, including an improperly inserted card, a corrupted card, or a compatibility issue.
Try these troubleshooting steps:
- Reinsert the Card: Power off your Switch and reinsert the microSD card, ensuring it’s properly seated.
- Test with Another Device: Try using the microSD card in another device, such as a computer, to see if it’s recognized.
- Format the Card: If the card is recognized by other devices but not the Switch, try formatting it using the Switch’s system settings.
Slow Loading Times and Performance Issues
If you’re experiencing slow loading times or performance issues after upgrading your storage, it could be due to a slow microSD card or a corrupted game file.
Consider these solutions:
- Check Speed Class: Ensure your microSD card meets the recommended UHS-I U3 speed class.
- Reinstall Games: Try reinstalling the games that are experiencing performance issues.
- Update System Software: Make sure your Nintendo Switch system software is up to date.
Error Messages and Data Corruption
Error messages and data corruption can be alarming, but they can often be resolved with a few simple steps. If you encounter error messages, note the error code and search for solutions online.
Here are some tips for dealing with data corruption:
- Run a System Check: Use the Nintendo Switch’s system check feature to identify and repair corrupted data.
- Restore from Backup: If you have a cloud backup, restore your game saves to a previous version.
- Contact Nintendo Support: If all else fails, contact Nintendo Support for assistance.
By addressing these common storage issues with practical troubleshooting tips, you can keep your Nintendo Switch running smoothly and enjoy uninterrupted gaming. If issues arise, research the issue on forums or reach out to Nintendo support for more help.
Future-Proofing Your Switch Storage
As game sizes continue to grow, it’s essential to future-proof your Nintendo Switch storage. This section offers tips on how to plan for long-term storage needs and stay ahead of the curve.
Let’s explore how to ensure your storage solution remains adequate as your gaming library expands.
Estimating Future Storage Needs
Estimating your future storage needs involves considering how your gaming habits might evolve over time. Will you continue to buy primarily digital games? Are there any upcoming AAA titles you’re particularly excited about?
Think about these factors:
- Upcoming Games: Research the storage requirements of upcoming games to get an idea of how much space they’ll take up.
- Expansion Packs and DLC: Factor in the potential for expansion packs and DLC, which can add significant storage requirements.
- Increased Digital Purchases: If you anticipate buying more digital games in the future, plan accordingly.
Investing in High-Capacity MicroSD Cards
Investing in a high-capacity microSD card is a wise move for long-term storage. While a 128GB or 256GB card might suffice for now, a 512GB or even a 1TB card will provide ample space for years to come.
Consider these options:
- 512GB MicroSD Card: A good balance of price and capacity, providing plenty of space for most gamers.
- 1TB MicroSD Card: The ultimate storage solution, ensuring you won’t run out of space anytime soon.
Staying Informed About New Storage Technologies
The world of storage technology is constantly evolving, with new types of storage devices and standards emerging regularly. Staying informed about these developments can help you make the best decisions for your Nintendo Switch storage.
Consider these strategies:
- Read Tech Reviews: Stay up-to-date with the latest tech reviews and articles to learn about new storage technologies.
- Follow Gaming News: Keep an eye on gaming news sites and forums for discussions about storage solutions.
- Experiment: Do not be afraid to try new options that could improve your gaming experience!
By estimating your future storage needs, investing in high-capacity microSD cards, and staying informed about new storage technologies, you can future-proof your Nintendo Switch storage and enjoy uninterrupted gaming for years to come. Be prepared for what is coming to ensure that your storage solution will not become obselete in the future!
| Key Point | Brief Description |
|---|---|
| 🎮 Assess Needs | Evaluate gaming habits to determine the required storage capacity. |
| 💰 Budget Options | Explore cost-effective microSD cards like SanDisk Ultra or Samsung EVO Select. |
| 💾 Archive Games | Archive games not currently played to free up storage space. |
| ☁️ Cloud Saves | Use Nintendo Switch Online for cloud backups to protect game progress. |
Frequently Asked Questions
▼
A microSDXC card with UHS-I U3 speed is recommended for optimal performance. This ensures fast data transfer rates, essential for loading games and transferring data quickly.
▼
Power off the Switch, insert the new microSD card, then go to System Settings > Data Management > Move Data Between Console/MicroSD Card to transfer data to the new card.
▼
Archive games not currently being played, delete unnecessary downloaded content like demos, and consider using a larger microSD card to expand your storage capacity.
▼
Try reinserting the card, testing it in another device, or formatting it using the Switch’s system settings. Ensure the card is properly seated and compatible with the Switch.
▼
Yes, cloud saves are available for Nintendo Switch Online subscribers. They automatically back up game saves to the cloud, preventing data loss and protecting your game progress.
Conclusion
Expanding your Nintendo Switch storage is a straightforward process that can significantly enhance your gaming experience. By understanding your storage needs, choosing the right microSD card, and managing your data effectively, you can enjoy a vast library of games without worrying about running out of space. Whether you opt for budget-friendly solutions or invest in high-capacity cards, the key is to plan ahead and stay informed.


